Sunday, October 22, 2017

Dirndls! (Burda 7057)

Been sewing like a fiend the last few weeks so I'll be trying to catch up.  Fall tends to be busy with sewing and costuming events.

We had an outing to MoAR with in robes en chemise (there will be a blog.  It's lengthy.)  Then we did the Brandywine Battle Reenactment the following weekend, which was hot as hell.  Took a weekend "off" (for sewing) and headed out to the Renaissance Faire for Oktoberfest.


Pattern Description: Dirndl folk costume with blouse, dress, and apron

Pattern Sizing: 6-20

Were the instructions easy to follow?

I never follow instructions.  That being said, we had to take a peek a couple of times just to make sure we were on the right track.  It’s a very easy pattern to put together.


Did it look like the photo/drawing when you were done with it? Yes!  We opted for bodices and skirts of different materials while the pattern uses the same fabric for both, which gives a bit of a different look.


What did you particularly like/dislike about the pattern?

I didn’t like that the apron strings aren’t lined.  We opted to cut fabric to cover the backs.

I didn't like the construction on the blouse at all.  I've made a lot of chemises (this is basically a short chemise) and this was way more complicated than it needed to be.

Fabric used:

For the red/white/grey dirndl –the skirt is a stiffer material meant to be quilt backing, the top is a very light weight quilting cotton lined in a heavier cotton sateen, the apron is a lightweight quilting cotton.

For the yellow and green dirndl – mystery quilted fabric for the bodice, a green flannely fabric for the skirt, and home decor fabric on the apron.

Pattern alterations or design changes you made: 

A lot of small things.

The pattern was too small for us, so we had to scale the bodice pieces up to get it to fit.  We added about 6 inches all around, which ended up being a bit too much for me.

The instructions have you close the center front with a zipper, we used hook and eye tape.

We cord gathered both skirts and I did several rows of cord gathering on the grey apron to get a faux-smocking effect.  If I made another I'd make the apron larger so that I could gather it down even more.  I finished effect is okay, but I don't love it.  I was way easier than cartridge pleating it. 

I extended the length on the red skirt by about 3 inches and made a super tiny rolled hem so that it wouldn't be too short.  I’m 5’8”, so things are usually a little short on me and I really wanted the skirt to hit at mid-calf for me.

I personally found the bodice to be too short.  I wish I had lengthened it by an inch or two to make it sit at my natural waist.  It would have helped with the skirt length too.

Both bodices use piping along the top edges, the curved side-back seams, and around the outside arm edges.

Rather than the trim suggested, I used a grey gimp braid on the red and white dirndl and a green leaf trim on the yellow and green dirndl. We didn't use dirndl hooks and lacing on either bodice, but that’s mostly because we didn’t have time to order them

Would you sew this again? 

Yes, definitely!  I think I have dirndl fever!


Sunday, August 20, 2017

Netherlandish Cyclone Gown

Hey, remember this thing I was supposed to be working on?


Comic version (not clothes)

 Woo!  It's a success!


Ren Faire version.  Very witchy.


Well, it looks alright anyway.  It's not really a gown.

The PIC and I have been going hard at some 18th century stuff and I haven't had any spare time to invest in the Netherlandish gown, so I had to cram it into one weekend.  Since I needed to get the whole thing done in a very short amount of time I took some shortcuts.

What's this?
 Why, it's a shot of the back of one of my dresses!


I used an existing UFO shift that I found in my stash and just rolled the neckline edge under to make a casing and slipped some cord through it.  Done.  The sleeves are larger than I'd like, but it gets the job done and was almost no work.  I just ordered a stupid amount of linen, so I'll likely make a nicer shift at some point in the future.


I drafted a quick and dirty pattern for a partlet.  It's basically just a rectangle with the edges on one side slanted for the shoulder cut 4 times, sewn together and the back and sides and open in the front.  I'm mostly happy with the way it turned out, except that I only had enough fabric for one layer which means that the hemmed edges are visible on the turned back collar.  The partlet is not in any of the pictures, however, as I tore it when I pinned it on before leaving. I have all that linen, so I guess I'll also make a new partlet.


The hat came together surprisingly quickly and easily.  I drafted the cone piece and then traced the brim of a straw craft hat. I doubled the felt on the brim, but it was still too soft to hold it's shape.   I added a bit of wire around the brim and flipped the whole thing inside out then attached to the cone.  It's a bit wonky where the edges of the wire pieces meet, but pretty good overall.  I've decided this adds to the "character".  The felt holds it's shape when I scrunch it, so I didn't have to add anything extra to get it to do that.  I also reshaped a craft hat into something resembling the appropriate straw hat, so I have that to wear if I decide to wear this as a regular ren faire outfit without the witch hat.


I had already started on an 18th century petticoat in the exact same fabric that I'd bought for the dress and opted to use that as a separate skirt and just make up a bodice rather than making a whole dress.  I used the 18th century bodice pattern but combined the back and side panels into one pattern piece.  It's self-lined.  I had originally planned to use lacing rings, but didn't want to mess with them with so little time so I just added a length of ribbon inside the lining piece of each side and stitched it down to make holes for the laces to go through.  I found the lacing rings the week after I wore this, so I suppose at some point I'll finish it properly.  I also have fabric to make a proper skirt piece at some point.  It's on the back burner for now.

The apron was an 11th hour project.  I procrastinated on ordering the linen and was waiting to see if it would come on time.  I only ordered a yard and just needed to hem the raw edges and attach it to some twill tape.  The back up plan was to buy a tea towel and paint it.

Luckily the linen arrived in time.  The stripes ran with the selvedge and I needed it to run the opposite way, I ended up cutting it down to a half a yard so that the width would be right.  I'm lazy and didn't want to piece the length, so it's a little short, but it works.

I just folded up some of the extra fabric and tucked it under the gown to create the stomacher.  I wore it over my 18th century stays for some shaping.  The stomacher piece I used was a little small, so I had to pin it in at the edges.  I didn't want to cut into the extra fabric because I'll need it for the skirt I plan to attach and if I wear the gown again I'll likely use a contrasting stomacher.

Hopefully I'll get around to finishing (starting) the black kirtle soon and will be able to layer it if I want.

A front, back, AND side view?  What's happening?


Thursday, August 3, 2017

Renaissance Comic Crossover

Renaissance Faire season is upon us!  Well, it's upon me.  Nearly upon me.  Whatever, I'm starting to work on Ren Faire stuff.

A group of friends decided to get a bunch of folks together  to do Renaissance themed comic book characters for Myths and Legends weekend.  By the time I found out, most of the likely suspects had already been taken, and I don't really read comic books, but a quick Google search lead me to Cyclone.  She's a red head, her costume is insanely simple, and it's green. Just green.  Perfect.


This...but actually clothing.
I've been wanting to make a working class Flemish/Dutch/Netherlandish outfit for a while, but hadn't had an excuse.  This was perfect; a relatively simple solid colored dress that I can layer with things.

Like the cook in this painting by Joachim Beuckelaer but green.


The best part was when I was trying to figure out a way to make the little tornado on the front when I realized I could just use yellow spiral lacing.  Boom.  So easy.

I had my little heart set on getting linen for this, but I ended up coming across an almost perfect cotton fabric at Wal-Mart for $1/yard and I couldn't pass it up.  The whole 6 yards cost me $5.50.  Five dollars and fifty cents!  That's less than what one yard of green linen would have.  It's good enough.

I did pick up some actual white linen for the partlet and I love it.  I keep touching it and it's so nice and soft and cool.  I'm basically molesting my linen.

I have a more or less finished white cotton chemise and I'm just going to use that in an effort to de-stash.  It'll be fine for now, but I do plan on making a linen shift at some point in the future.  Mmm linen....

I opted to use an apron to mimic the red and white striped socks rather than wearing socks and hiking up the skirt.  Sometimes I think I'm pretty clever.  I am also incredibly lazy, so I'm turning a tea towel into an apron.

I'm wading into the controversy of Netherlandish gowns.  After spending entirely too long staring at Flemish paintings, I don't buy into the split overdress argument.  It just doesn't look like it's an open overdress over a kirtle to me, so I'm choosing to make mine as a single piece with some kind of fabric behind the lacing.  Also, August is hot and if I can avoid wearing two layers of fabric then I'm going to do that.

A witch hat!


She also has a perfectly adorable, but not even slightly Renaissance period appropriate, witch hat, which will absolutely be done because it's a themed Ren Faire costume and it's going to look cute, and I just don't care.


Onward, to the sewing!

Tuesday, June 27, 2017

Completed Bastille Day Outfit

(Since it's almost Bastille Day 2017, here is the progress update from Bastille Day 2016)

I managed to get the stays to look somewhat presentable!

The straps were a bit short, so I ended up adding some fabric to them.  This turned out to be a bad idea.  The stays rode up the whole day, which made the straps slip off my shoulder.

I used round reed to bone the channels.  This wasn't nearly as difficult as I though it would be.  Granted, I put more than one piece in each channel and I'm perhaps not supposed to do that...

I bound them using a leather chamois cloth from the auto section at Wal-Mart.  It worked surprisingly well and the yellow color even ended up matching the stays!


The completed stays
(with pocket and bum pad, not worn in 2016)

About mid-way through this project, over the summer, I found a wasp's nest in my sewing room.

Yeah.  Awesome.

I was minding my business making a circle skirt when one of the bastards flew by me.  I didn't think anything of it until I happened to see the nest.  It was small, but I freaked right the heck out and took off down the stairs shrieking.

I still think this is an appropriate response.

I rescued the sewing machine and brought it downstairs to finish the skirt, but the wasp was also holding my fabric hostage.

I ventured up a few times during the week to grab some things, but I knew we had to destroy the nest or it would only get worse.

Googling things did not help.  Seriously, do not Google wasp's nest.

We sprayed the heck out of it one night with wasp killer and I was pretty sure we'd gotten them, because the nest was soaked.  Like running down my walls soaked.

I went up, cautiously, a few days later to do some straightening up and thought everything was fine, until something buzzed past my ear.

Damn wasp! (More shrieking and bravely running away)

We sprayed the nest again that night and I scouted out the area a few times and didn't see anything.  I didn't end up attempting to knock the thing down until about October, which meant that not much sewing actually got done last summer/fall.  I'm blaming the wasps.

At any rate, here's the pictures from Bastille Day!

I managed to complete the bodice safely in my living room (far, far away from the wasps).  Unfortunately I did not have time to put a proper closure on it before I needed to go and quickly (poorly) stitched on some ribbons to tie it shut.
Oh look, 2016 selfie...
You can sort of see the ribbons here.
I may need a fichu...

I actually really like the way this looks, but because I did it so quickly before I left the house they didn't hold up to the strain of actually holding the bodice closed and I lost one almost as soon as we arrived.  If I did it again I'd probably make some button holes and run the ribbon through them.

The skirt is awesome and was so quick to make up, but I really needed a bum pad to plump the back up a bit.  As always, I leave the undergarments too late and don't complete them.  The bum pad is now completed and was so easy that I really shouldn't have put it off last year.

In progress with incomplete bodice,
incomplete hat, and fake fichu.
My dress form does not do it any favors.
I faked the shoes with the grannie shoes I wore at Jazz Age the year before, just added a ribbon to them. They looked pretty good, but I had to toss them after the event because the heels totally caved in on me. (Now I have lovely shoes and buckles, so I don't need to worry about this again.)

I had planned to make a hat using one of those straw craft hats, but it just wasn't coming together.  I tossed together this little beret, which seemed appropriate, and finished it with a red, white, and blue cockade, which took forever.

The beret is literally just a circle of fabric gathered around the edge.  I stitched it to a piece of bias tape to finish it, but thought I was going to be hiding it under the edge of the straw hat, but that didn't work.  I had sewn the black bias tape to the navy beret with white thread, but didn't want to pick the stitches and redo it.  I colored over it with a Sharpie.  I have no regrets!

Rien!  Non! Je ne regrette rein!

All in all, I really like the way it turned out even though there're always things I'd change.

The power lines really set the scene, don't you think?

Bastille Day 2017 is in progress now.  And by "in progress" I mean I have fabric and a sketch and it's 18 days away.


Wednesday, June 14, 2017

Return of The Steamy Sari

Oh my gosh, it's a costume re-wear!

I happened to get an email from my corset supply shop with some information on a local event they were vending at featuring an awesome jungle-tastic photo.  It seemed like a fairly good place to take some south/south east Asia inspired photos, so it was sent on to the Partner in Crime.

Due to unforeseen circumstances, the Partner in Crime wasn't able to attend Steampunk World's Fair this year.  We had spent a while working on her Thai dancer costume and she was pretty upset that she didn't have a chance to wear it.

I had only worn the sari outfit for a few hours at SPWF, so it seemed like a pretty good opportunity to get some more mileage out of the outfit and get some awesome photos.  It's also nice to only have to track down my costume parts and not be rushing to finish something at the last minute.


Me, elegantly dying in the fernery.

That being said, I'd had some issues with the brown bodice being too loose at SPWF, so I made some alterations to make it fit better ultimately taking out about four inches from the sides and another four inches from the center back.  It's still a bit loose, but the fit was better overall.  Still not happy with the bustline, but that will only be corrected with a proper mid-bust corset.  I also added an extra hole to my belt with an awl (not the best tool for the job...), so now it's sitting at the waist as intended.

I managed to get the fake hair paranda to work this time around and it bulked up my braid nicely.  (I have an unhealthy relationship with cheap fake hair extensions.) I might consider making a more traditional paranda just to add some more color to the outfit.

I made some minor changes to the accessories as well.  I found some bangles that I had wanted to wear the first time around, but couldn't locate at the time, changed out the gold earring for green ones, and added a vintage Victorian sash pin that I bought at SPWF.

The lovely sash pin

I prefer the green earrings.  They're a bit more interesting than the gold ones and I think they complement my skin better, however, they kept getting stuck in my hair (well, they keep getting stuck in the fake hair).


Original gold earrings.
No schvitzing.
Halfway decent shot of the earrings, sash pin, and bangles
if you ignore my schvitzing.

I'm considering getting a new petticoat for this.  I've worn it both times with a white petticoat, but because the lace is cream all of the detail is lost in photos.  If I wear it with something darker, that detail will stand out better.

Detail of the brown linen and cream lace


We headed out to the Morris Arboretum pretty early in the day, which ended up being a good idea since it was so damn hot.  We've been having some pretty great weather lately, so naturally the day of the event was over 90 degrees (this seems to be a recurring theme in our summertime events).

We wandered a bit, getting lost several times because we both have a terrible sense of direction, but (exhausted and hot) finally made it to the fernery.

The fernery was built in 1899 and is currently the only free-standing fernery in North America.  It houses a collection of ferns from around the world and a koi pond and made an awesome backdrop for some steamy (literally) photos.

Thai dancer on the wooden bridge and
some of the greenhouse glass in the background

Approximation of what I might actually look like in India.
I am so hot my face is red.  

Undoubtedly the fernery would be lovely in the winter, but it was already oppressively hot and humid when we visited, doubly so in the fernery.  We managed to get some decent photos, but scurried out immediately after.  Emerging back onto the path outside felt like air conditioning after the fernery.

We called it a day after only a few hours, since it was so darn hot.

The arboretum is really very beautiful, particularly the rose garden, so we'll have to go back when it's not quite so hot to explore a little more and maybe take some more photos.


Monday, May 8, 2017

Pattern Review: Truly Victorian 263: 1887 Imperial Skirt

Pattern Review: Truly Victorian 263: 1187 Imperial Skirt

Pattern Description:

Has a wide front gore and a narrow side gore, which extends over the bustle to give a narrow, extended look to the back of the dress.  The full back panel has a burnous pleat at the center which also acts as the closure.


Pattern Sizing:

I made view A, the floor length walking skirt.  I made size "K" to fit over my corset.

Did it look like the photo/drawing on the pattern envelope once you were done sewing it?

Yes, but it absolutely needs to be worn over a sizeable bustle or it won't look right.  I had already made an imperial bustle that I drafted myself.
 
Were the instructions easy to follow?

Once again, I didn't follow instructions.  (Bad sewer.)

What did you particularly like or dislike about the pattern?  

Incredibly easy to lay out, cut, and put together.  Because the pattern pieces are heavier paper, not tissue paper, they don't move around much.  I just used pattern weights (olive jars, whatever...) to hold down the edges and cut around.  Then just pin and stitch.  Easy peasy.

Fabric Used:

First version in a mystery black home decor fabric, probably some kind of polyester.  In a later version, a green silk dupioni interlined to cotton broadcloth.  Neither version is lined, but I did interline the silk.


Pattern alterations or any design changes you made:

The first version (not pictured) was just the slightest bit short with my shoes on.  I'm 5'8" so most things that are meant to be floor length on my just aren't.  I added about two inches to the length and did a tiny hem and it's perfect. The pleated trim at the bottom is just a tiny bit longer.

Would you sew it again? Would you recommend it to others?

Yes, absolutely!  It's so easy to put together and looks great!
 
Conclusion:

I'll definitely make this one again!  I'm used to projects taking me days to finish, but I had this one mostly done in an afternoon.  I did not hand sew this, except for some finishing on the hem and the back pleat. None of the green dress was hand-sewn.


Steampunk World's Fair 2017

I'm back from Steampunk World's Fair 2017!

I actually managed to finish my sewing mid-day Thursday before the event.  This is unprecedented!  I also took some halfway decent photos!

Friday was an easy outfit day.  I wore my Egyptian archaeologist/explorer costume.  It's probably the most typically "steampunk" costume I own, but of course I like to make things a bit different, so I have my very Aussie looking slouch hat.  Overall its not historically accurate, but very evocative of what European visitors to Egypt would have worn.

Pretty much everything was thrifted for this, so it was nice and easy to put together.


In the interest of honesty in costuming, here are some issues with this outfit: I ended up having to change shoes with this outfit.  The ones I wanted to wear look amazing, but there's just too much walking and the heel was too high.  My back up shoes saved me!

I ordered 2 pairs of stockings to wear with this and neither of them worked.  I ended up finding a pair of olive green tights, but of course you can't see them in this pic.

I made a massive (massive!) mistake in drafting the hip pouch.  It was supposed to have grommets and lacing up the back, but was so big that I had to stitch the back panels together and it overlapped by about 7 inches.  Oops.

Saturday was a two outfit day.  I started the day in the sari outfit.


I really love the way this turned out.  It's an absolutely beautiful lace, unfortunately because of the pleating and wrapping some of the detail is lost in photographs.

The bodice was made kind of last minute, but I used the same pattern I had used on the green dress and didn't expect any issues,  For some reason the bodice is much, much bigger than the green one.  I think I must have made the seams just a bit smaller, resulting in a looser fit.  It was difficult to wear since it kept slipping off my shoulders, this wasn't helped by the weight of the lace draped across my left shoulder.  It'll need to be adjusted before wearing it again.

I love the linen that I found for this, though, and I'm planning to do a longer sleeve and a matching skirt at some point in the future.


I changed in the middle of the day into the green dress.


I'm still really happy with this.  It's definitely an attention-getter.  It photographs well, but the color is even more vivid in person and sets off my skin and hair color really well.  It's a statement. I got loads of questions about how long it took to make (not that long) and the patterns I used (Truly Victorian), etc.  I love talking to other costumers at these events!

The bustle was giving me some issues during the day getting stuck up after sitting.  I'm not sure what I did, but it's something to keep an eye on.  I still desperately need some petticoats.  I may also need to take the top hoop in just a little bit.  Overall still happy with the look, though.

I'm really happy with the time I put into the pleats, but it's still lacking in trim.  I found a couple of yards of black trims in my stash, so I'm planning to work on adding that between events.  At some point I'll also add an over skirt and I'll trim that as well.
Something like this.  Trims on trims on trims!

I also made a hat!  It was my first time making a hat, so it's not perfect, but overall I think it came out really well and I definitely learned a lot.  It was a total pain to do since it was all hand sewn, but I'm happy with the way it turned out and not afraid to make another at some point in the future.

Not perfect, but pretty darn good!


Sunday is always saved for easy outfits,  I wore my Midnight Orchid outfit and finally got a picture of it.  I also bought this amazing sash at As They Sew in France.

I was tired.  So, so tired.


Silly shot, but a better view
of my Nasty Woman sash.
I've been planning a late Edwardian walking suit for a while and I think that this sash may be an excuse to make it.  I already bought fabric for it!  No idea where I'll wear it since the fabric is a heavy cotton flannel, but I'm sure I'll find somewhere.

Wednesday, April 19, 2017

Steaming Ahead

Holy crap, Steampunk World's Fair is in fifteen days!

Planning is well underway and I'm being far more reasonable with my costume plans this year...but I'm still in a bit of a panic.

I am attempting to use a lot of things I already own with very little modification, so hopes are high that I won't be sewing into the wee hours the night before the event.

We'll see.

I'm planning four outfits, though given our history, we almost always end up adding an outfit once the schedule comes out (usually 1-2 weeks before the event).  That would make five outfits over three days.

Right.

So, the current game plan:

1. Green Victorian dress for at least part of one day.  I've added the pleated trim that I didn't get to complete before Christmas, but it still needs more trim.  I think that this dress is going to be something that I wear a lot and just keep adding to, partially because I'm never satisfied and partially because of my intense commitment to procrastination.  I'd also like to finish the hat I started, but we'll see if that actually gets done (because fifteen days, OMG).

Pleating...

I hate pleating.


2. ANUBIS archaeologist.  This one is brand new and I think it's super cute, plus I managed to do it almost entirely from things I already own!  I'm in the process of making a hip pocket/pouch thing for this, but everything else is from the stash.  I found a white "old lady" skirt at the Goodwill, paired it with a white linen shirt (also from Goodwill) and a vest I made years ago, add in some belts and I think works.  I also have a fun hat for this one!

Basic, but still kinda cute, I think.


3. Steamy sari, also new! I've been wanting to do a Indian/steampunk fusion outfit for a while and just haven't liked what I've seen other people do or what I've come up with, but I think I may finally have it.  The plan is to use some lace fabric draped like a sari and paired with a Victorian bodice.  I'm hoping for cute results once I finish the bodice.  (fingers crossed!)

Something like this, but not exactly


4.  My outfit from Midnight Orchid.  I purchased this at SPWF 2015, wore it to SPWF and the Ren Faire last year, may have worn it to Steampunk Unlimited and just wear it around town because it's cute.  It's a cute, easy Sunday outfit.  I'll most likely pair this with my red cotton underbust, shirt to be decided.

Lord only knows what else we may add to this or how we'll fit it in.  We've been kicking around the idea of doing some circus themed outfits, so if there's even the slightest reason for that to happen this year I'm pretty sure we'll double down on it and make it happen this year.


The Best Laid Plans

The Plan

We became members of the new Museum of the American Revolution in Philly a few months ago and intended to go out for their opening weekend, April 22.  However, we ended up having a scheduling conflict that weekend and every weekend until at least the middle of May.  We found out that they were having a special members-only preview weekend April 15th and 16th and decided to make it out on Saturday.  I should have known then that this project would be more difficult than imagined.

The Partner in Crime just started a new job where she's working ten hour days whereas I've had a lot of free time, so I offered to work on her outfit for her and I wanted to make an overdress to wear with my red petticoat.  This all seemed like a good idea at the time.

I didn't expect any of this to be terribly difficult or time consuming...after all, I only needed to make a few pieces!

For her:

The Petticoat: Petticoats are easy!  And since she's similarly sized to me, almost an exact copy of mine, I'll just needed to hem it for her.  No big deal.  (Famous last words...)

The Jacket:  She decided to add a little peplum and the swallow tail back to the Simplicity Outlander jacket pattern. The jacket fit her well overall, but we needed to make the sleeves a bit bigger and do a mockup with the modifications to make sure they actually worked. But that's easy!  (You see where this is going, right?)

The Stomacher: She also decided she wanted to make a stomacher, which I didn't make for mine since I modified mine to have a front closure.  The Simplicity pattern comes with a stomacher and we planned to used that pattern.  No modifications!  Easy!

For me:

A new overdress.   Yep, "just" that.

For both of us:

Some undergarments; bum pads and pockets, and hats.

The Reality


These costumes almost weren't. 

She happened to have Friday off and no part of either of our outfits was actually completed at the start of the day.  Then things needed to be purchased, trips to the craft store needed to be made, we were plagued with weird and annoying issues, including that a large portion of Philly is shut down for the NFL draft, and we still had no idea how we were actually going to get into the city (at one point a horse drawn carriage was considered.  Not kidding).  Although we got a lot of work done, by the end of the day it was obvious that we weren't going to make it out Saturday.  We decided to work at it again on Saturday and ultimately did make it to the museum on Sunday, but on the way home, after a third very long day, we both admitted that we almost packed it in and called the whole thing off.  I'm glad we didn't.

Her Outfit


This whole thing was done in about 2 days,


The petticoat is just a basic petticoat.  I French seamed the side seams and pleated the top to the waistband.  I did learn when I made mine that the front ties need to be long enough to wrap around the back and then back to the front or I can't keep them tight enough.  When she bought the fabric we both swore it was blue.  It's labeled as navy and definitely looked navy in the store, but it's purple everywhere else.  It was almost as easy as I thought it would be.

For the jacket we started with the Simplicity 8161 pattern, but added a swallow tail back and a little peplum at the front, loosely based off the garments in the Janet Arnold book and Costumes Close Up.  We also needed to make the sleeve just a bit bigger.  It's still not fitting exactly right, but it's an easy fix.

She made fabric covered buttons and we used the "button trick" to set the buttons.  These buttons are the cutest things and now I'm mad that I didn't do covered buttons for mine.

The stomacher is straight from the Simplicity pattern, no modifications.

My Dress


Before starting on her stuff, I had mostly completed my dress.  I'm using that Waverly Felicite "curtain along" fabric in cream.  I had bought the very last 3 yards of this stuff when I caught it on sale last year.  I stalked the remnants section and managed to find two pieces, each about a yard.  I had just enough to get all the jacket bits on the remnants and make the skirt out of the 3 yard piece.  I only realized after it was all together that the colors are very slightly off between the top and bottom.  they must have been from different dye lots.

That pattern matching is entirely by luck


I used Simplicity 8161 for the bodice, modifying it to close at the front with buttons.  I also added a long skirt intending to fluff it up retroussée (this is all actually held up with safety pins, one of which may have poked me in the bum.  Yep.)  I need to make a small adjustment and pleat the skirt back just a bit at the front since I've got it meeting at the middle.

It was more than a little windy.
My hat attempted to make an escape several times.

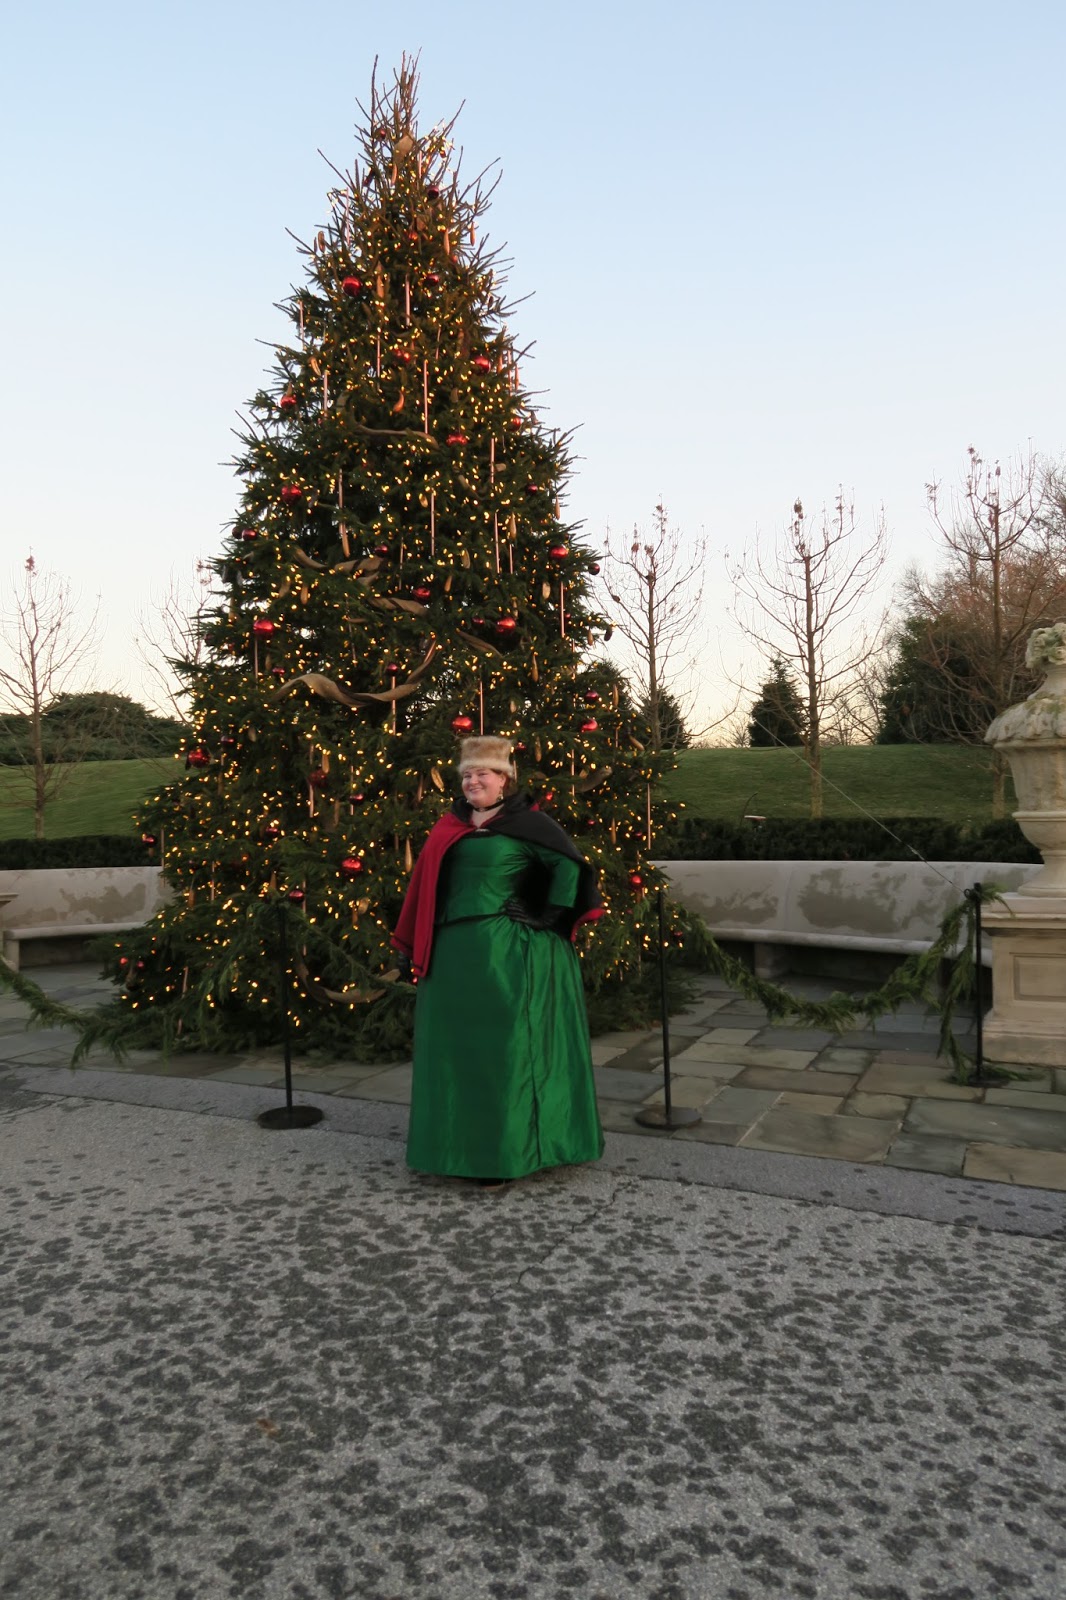
All that was left at the weekend was to buy buttons and add the button holes.  My machine does them and I am not a glutton for punishment, so I intended to use the machine.  However, I am forgetful.  I have used the buttonhole function on my machine once.  At Christmas.  For my green dress.  I could not figure out how to get it to work then and I totally forgot how I made it work when I tried again this time.

It took an hour of Googling and fiddling with the machine to remember how to do it.  Ten minutes later my button holes were done.  YAY!


Undergarments

Then we moved on to the undergarments.  I used Costume Close Up to draft out a pocket, which was really no big deal.  Hers is made from her jacket fabric and mine is made from some toile I bought years ago and never used.  Since mine is lighter weight I lined it in some faux linen that's also been languishing in my stash for years.  I mounted them on some ribbon and we were good.

For the bum pads, I used the Simplicity 8162 undergarments pattern.  I just bought another copy of the pattern, but of course I couldn't find it when I was looking for it.  I had to dig through a basket for the older copy.

I like big bumpads and I cannot lie!


Thankfully, I found it and we could move on.  It went together easily, but I accidentally bought quilt batting rather than fiberfill.  Whoops!  And I cut mine on the selvedge rather than the fold....We made it work. Hers is made of a plain muslin and mine is more of the toile.

I actually really like my undergarments.  The shape on the petticoat is (obviously) totally different (better) than when I wore it without the bum pad (Bastille Day) and I think the fabric is super cute.

Plus, those pockets are the best freaking things in the world!  They're huge, so I could fit my car keys, wallet, cell phone and sunglasses with room to spare.  The weight is totally supported by the stays and I didn't have to worry about pick pockets!  I think I might make another to carry a water bottle... Pockets for everyone!

Seriously, that pocket is huge.
The Finishing Touches

Ages ago I'd found an adorable hat at the Goodwill.  I assume that it's an Easter bonnet from the 1960s, but it looked like a bergere to me, so I bought it.  It got buried under a pile of other hats which conveniently toppled over while I was looking for something else in the sewing mess room.  It was probably true white at some point, but age has toned it down to a creamier color.  I thought it was still too light for the dress, but mentally tucked it away, just in case.

At about 10 PM on Saturday I realized I still hadn't completed my hat.  I attempted to add some trim to it, but I was totally burnt out from the two day sewing marathon and I just couldn't wrap my brain around it.  I decided to just go with the vintage hat.

Sunday morning, just before I left, I realized that I had no way to attach the thing to my head.  I found some white ribbon in the stash and safety pinned it inside the brim to tie it around the back under my hair.  It held up surprisingly well!

The adorable tilt in the brim
may or may not have been caused
when it flew off my head
and got stuck in a doorway.

I also knew I needed some kind of fichu, but I didn't really have any suitable fabric in my stash.  I have a bad habit of taking home wayward scarves from the Goodwill, but I couldn't find anything (at 2 AM on Saturday) in the color I wanted that didn't look too modern.  When I woke up I remembered that I had some more scarves in the sewing room and I found this cream lace one.  It worked!


Shoes are from American Duchess.  I'm wearing the oxblood Kensingtons with the Fleur buckle and she's wearing the white Georgiana's with the Valois buckle.  They're so comfortable!  We walked around the city and museum for hours and they held up really well.  This is the first time I've worn them for longer than an hour and I did have one blister, but I think my sock is really to blame for this one.

I'm not 100% happy with these outfits, but overall I really like both of them and people were very nice about them.  I felt way less crazy walking around Philly in this than I thought I would, though we were definitely a spectacle.

Monday, April 17, 2017

Playing Dress Up at M*AR


Taken just outside the 2nd floor bathroom.
The stalls are large enough to get in and out of easily in that dress.
I am eternally grateful.  

The partner in crime and I headed out to the brand new Museum of the American Revolution in Philadelphia this weekend. The museum doesn't officially open until April 19th, but they had a special members-only preview on Saturday and Sunday.

The museum is absolutely beautiful and very well laid out.  I majored in anthropology with a minor in art history, intending to go on to a master's in museum studies.  My life didn't play out that way, but it's always something that I've wanted to do and I really appreciate what they've done here.  There's a good mix of interactive displays and I didn't find it to be "dumbed down", which can really kill the appeal of an exhibit for me.

We started out watching a short movie on the first floor and I smelled something really nice, earthy but also kind of spicy.  Initially I assumed it was someone's perfume but I kept smelling it throughout the museum.  It is the museum.  The museum is so new that it smells good.  Like wood. Mmm

We went upstairs and started through the exhibits, attempting not to take out any unsuspecting children with our large rumps.  We were mostly successful.  We did have to explain a few times that we didn't work at the museum, but we expected that.  The actual museum staff are very helpful and friendly!


Ma Easter Bonnet!


We didn't take many pictures inside the museum (dark, crowded, no flash photography) but we took some selfies in a hallway while waiting for the Washington's Tent exhibit.  We're getting better about getting real photos, but old habits die hard!  (Plus, my hat's really cute.)

Unfortunately we didn't allow enough time to get through the whole museum before they closed, so we'll have to go back soon!


We did take some decent photos!


I'll write up another little post with some "behind the scenes" stuff (aka everything that went wrong), but I have no construction photos because I was literally working away for two days without stopping.


Saturday, January 7, 2017

Very Victorian Christmas

While I'd really like to catch up chronologically, we're going to start with Christmas since I actually managed to get some halfway decent photos taken of this outfit.  Baby steps...

My partner in crime ordered this absolutely gorgeous dress from As They Sew In France in 2015 and it was finished in time for her to wear it at Steampunk World's Fair in 2016.  I picked up a pair of green earrings and made an off-hand comment about needing to do a green dress to match her red one and wear it at Christmas.  And so the Christmas dress project was born.

Now...that was May and naturally I didn't even start on this until December.  I wanted a dark green taffeta and really didn't think that would be too challenging to find.  I was so, so wrong.

In October I started the hunt for fabric, but I wasn't finding anything at all that I liked in the stores.  I was hopeful that there would be some more options nearer to Christmas, but nothing came up, which left me in a panic in mid-November.  I resorted to looking online, but wasn't finding anything I liked in my price range or the color I wanted.

I found a great silk taffeta at Renaissance Fabrics, but it was more than I wanted to spend on this project.  I "settled" for this emerald green dupioni from Silk Baron.  This is really gorgeous fabric and I love the way it looks, but I would have preferred something smooth without the slubs that dupioni has.  I picked up some cheap cotton broadcloth to use as interlining.  I've never interlined anything before, but it didn't cause any problems and gave the silk some nice body.

Shipping was blessedly fast on the silk and I cut the skirt that weekend using a pattern I'd already used.  The skirt was mostly done that weekend, aside from hemming and the waistband and there it sat for several weeks.

I was terrified to even start on the bodice because I was worried it wouldn't fit and I'd have to make a ton of adjustments.  So I made a mock up.  It went together wonderfully and it fit great!  I needed to make a small adjustment to the back, but my fear was not warranted.

I used Truly Victorian patterns for both of the pieces.  They made up quickly and easily and fit great.

I'll have a proper review of the bodice and skirt up in a bit and will try to take pictures of each piece on my dress form so that there's better detail.

I had the brilliant idea to intentionally go out in costume and take photos, which we never do.  We decided Lonwood Gardens would make a pretty backdrop since they put up lots of pretty decorations for Christmas.  We decided to go on Christmas Day, thinking it would be less crowded.

It was not less crowded.

We ended up not even going through most of the greenhouse since we could hardly even move around, but still managed to get some nice shots; a few outside before it got dark and a few in the ballroom after caroling.

Every time we stopped to take a picture other people would ask for pictures, either of us or with us. We usually wear our outfits somewhere that it's expected, so we don't normally deal with this.

Is this normal?  Because it felt weird.

On to the costumes!!


I'm wearing this over one of my underbust corsets from Orchard Corset.  I'm reducing probably about two inches.  Not a lot, just enough to give me a bit of shape.  Unfortunately, since it's an underbust corset the line is a little wonky at the bust.  This would look better with a mid-bust corset, but I'm not in any hurry to make one.

My sad, un-trimmed skirt.


I'm also wearing the massive imperial bustle I made for Steampunk World's Fair in May.  I was worried that it was too big, but seeing it under this skirt I can see that it's just fine.  (But seriously, this thing is actually huge.)

I really wanted a butt-shelf and I think I got it!


The red cloak was made years and years ago for a little red riding hood costume.  We rarely do outside things in cold weather, so I have no other appropriate warm(ish) things, but I thought it worked rather well.  At some point I need to make a new one, but it's been getting me through.


I made the hat to match a muff (which I'm not wearing) and a real fur stole (which I decided not to wear).  It was an easy project; just a strip of faux fur attached to a circle of the same.  I lined it with some fleece from my stash.  I should have made it just a little bit bigger, but it worked and was really quick to put together.


Although you can't see them, I'm also wearing my Victoria carriage boots from American Duchess. They're so cute with their little bows!  They peeked out just a little when I walked and made me happy.

Happy Christmas!